
Optimized Python Docker image: From 1.2GB to 75MB

Author: Hyunwoo Jung (GitHub)
Introduction
Annotation AI, Docker Optimization Case
Annotation AI's various services package dependencies and distribute them as Docker images. In this article, we will introduce the experience of optimizing Docker images using FastAPI as an example, and explain how to optimize Docker images.
Initial Dockerfile without optimization
FROM python:3.8
RUN apt-get update && apt-get install -y make curl vim
WORKDIR backend-service

COPY requirements.txt .
COPY Makefile .
RUN pip install -r requirements.txt
COPY . .

CMD ["make", "run-server"]
The example above is a Dockerfile packaging FastAPI. Run the server after installing the dependencies using the python:3.8 image as the base image. A Docker image is being built every time at a specific distribution point, but there is feedback that the build speed is too slow, so we are trying to improve the build speed by optimizing the Docker image.
Before optimization, let's first check the capacity of the currently built Docker image and the base image in use. As shown in the result below, the currently built image occupies approximately 1.21 GB, and the base image occupies 913 MB.
$ docker images

REPOSITORY              TAG            IMAGE ID       CREATED             SIZE
backend-service        latest         28763e8659a8   12 seconds ago      1.21GB
...
python                  3.8            51a078947558   3 weeks ago         913MB
How to optimize your Dockerfile
To improve slow builds, we need to make the Docker image lighter. Before looking for ways to optimize Docker images, we asked Chatgpt how to optimize Docker images to obtain general information.
💡Q. How can I optimize my docker image? Give me some checklists and references.
- Use a lighter base image.
- Reduce the number of layers.
- Use caching aggressively.
- Delete unnecessary files.
- Use COPY instead of ADD.
- Use ENTRYPOINT instead of CMD.
- Use a multi-stage build.
- Use a .dockerignore file.
Based on the keywords obtained from the answers (Base-image, Multi-stage build, etc.), additional research was conducted. In conclusion, let's optimize the image by applying the best-practices of the Docker official documentation and some of the methods suggested above. Here's how I used it:
- Selection of an appropriate base image
- Remove unnecessary packages
- Multi-stage build
- Minimize number of layers
- remove cache
Optimize Dockerfile
Initial image specifications and applied optimization method
FROM python:3.8
RUN apt-get update && apt-get install -y make curl vim
WORKDIR <Service>

COPY requirements.txt .
COPY Makefile .
RUN pip install -r requirements.txt
COPY . .

CMD ["make", "run-server"]
The original Dockerfile was structured as above. It consists of using python 3.8 as a base image, installing basic dependencies to run the server, and finally running the server. Building this file will create an image that is approximately 1.21 GB in size. Now, to optimize the size of this image, let's first apply methods 1, 2, and 3 mentioned above.
- Selection of an appropriate base image
- Remove unnecessary packages
- Multi-stage build
Select Python Docker Base image and remove unnecessary packages
First, we try to select an appropriate base image. The reason why I decided this first is that the package installation part and the multi-stage part may differ depending on the base image. For example, the OS used may differ depending on the type of base image. If the OS is different, the package we want to install may not be installed.
Base image tag
If you look at the Python docker official images, you can see that it supports many types of base images. Base image types are divided according to the tag. The figure below shows some tags used as base images.
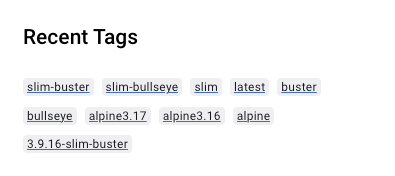
Each tag of the base image has its own meaning. We'll explain a few of the more frequently used ones.
- Slim: Indicates that the image is installed with only the minimum required to run the base. For example, in the case of python-slim, only the minimum required to run python is installed.
- bullseye / buster / stretch / jessie : These images use Debian-based os. The tag name is different depending on the version information of the Debian-type OS.
- bullseye : OS for Debian series 11 version (current stable version)
- buster : Debian series 10 version OS (old stable version)
- stretch : Debian series 9 version OS
- jessie : Debian series 8 version OS
- Alpine: This is an image using Alpine-linux os. alpine-linux is a very lightweight Linux os of around 5MB. The OS does not use C lib, but uses something called Musl, which can cause problems such as C-dependency problems/difficulty in debugging.
Python-slim Image
There are several base images, but I tried to optimize by selecting one of the two base images, slim and Alpine. The following is the capacity when slim and Alpine images are pulled.
REPOSITORY                                         TAG            IMAGE ID       CREATED          SIZE
python                                             3.8            51a078947558   3 weeks ago      913MB
python                                             3.8-slim       61afbf515f15   3 weeks ago      124MB
python                                             3.8-alpine     201f0ed8f699   7 days ago       48.2MB
Whichever of the two images is used, the capacity is smaller than the 913MB of the existing base image Python3.8. Python-slim is 124MB and Alpine has 48.2MB. Looking at the results alone, Alpine looks more attractive, but since Alpine uses alpine-linux, a lightweight OS, side-effects may occur. For example, it may not support installing essential packages. Therefore, after optimizing using the Python-slim image, try to optimize the Alpine image.
FROM python:3.8-slim
RUN apt-get update && apt-get install -y make curl vim
WORKDIR <Service>

COPY requirements.txt .
COPY Makefile .
RUN pip install -r requirements.txt
COPY . .

CMD ["make", "run-server"]
This is the result of building using the Python-slim base image. You can see that the capacity is reduced by about 1/2 from the existing 1.21GB → 647MB.
REPOSITORY                                         TAG            IMAGE ID       CREATED              SIZE
backend-service                                   latest         28763e8659a8     seconds ago      1.21GB
backend-service-slim                              latest         0b8e4b1b8f0c     seconds ago        647MB
Remove unused packages
The size of the Python-slim base image I checked earlier was 124 MB. But after building, the size of the image is 647 MB. This means that, apart from the base image, several packages are installed to increase the capacity. So you want to remove all but essential packages for optimization. For example, there may be packages that are not needed for actual deployment, but are used during debugging and development. In this case, divide the packages for distribution and development, and install only the packages for distribution.
First, I confirmed that curl and vim were not used, and deleted them inside the Dockerfile. And delete unused python dependencies. The following are the dependencies that were previously installed. Some of the packages used only during development (Formatter, Linter, etc.) are included.
pre-commit == 2.17.0

# setup
fastapi == 0.79.0
uvicorn == 0.18.2
psycopg2 == 2.8.6
numpy == 1.23.5

# formatter
isort == 5.10.1                 # imports
black == 22.3.0                 # coding style

# linter
pylint              == 2.12.2   # python static code analysis
mypy                == 0.931    # type check
flake8              == 3.8.4    # PyFlakes + pycodestyle + Ned Batchelder’s McCabe script
flake8-docstrings   == 1.6.0    # pydocstyle tool to flake8
flake8-annotations  == 2.7.0    # PEP 3107-style function annotations
flake8-builtins     == 1.5.3    # check python builtins being used as variables or parameters
flake8-bugbear      == 22.1.11  # find likely bugs and design problems

# pytest for linting and unit test
pytest          == 6.2.5
pytest-pylint   == 0.18.0
pytest-flake8   == 1.0.7
pytest-mypy     == 0.8.0
pytest-cov      == 3.0.0        # coverage reports
python-dotenv   == 0.21.0

# converter
xmltodict       == 0.13.0
If you delete all the packages used only during development, only the following packages remain.
# setup
fastapi == 0.79.0
uvicorn == 0.18.2
psycopg2 == 2.8.6
python-dotenv   == 0.21.0

# converter
xmltodict       == 0.13.0
When building by excluding unnecessary packages and leaving only essential packages, the size is reduced from 647MB to 395MB.
REPOSITORY                                         TAG            IMAGE ID       CREATED              SIZE
backend-service-slim                               latest         0b8e4b1b8f0c    seconds ago        647MB
backend-service-slim-essential                     latest         3b0a04ca5bb2    seconds ago        395MB
Python-alpine
Alpine images are also tested. There are also packages that are not supported by Alpine, so be careful with this part when testing. When building with the Alpine image, you can see that the size has been reduced from 395MB to 325MB.
REPOSITORY                                         TAG            IMAGE ID       CREATED              SIZE
backend-service-slim-alpine-essential              latest         b0bbf2507cf5   10 minutes ago      325MB
There is a curious point. The size of the Alpine base image is 48.2MB, but it increases to 325MB when built with required packages. It feels like optimization is not done right.
Multi-stage Build
What is a multi-stage build?
Multi-stage builds are the ability to create images with multiple stages within one Dockerfile. By including only the files necessary for each step, the size of the final image can be reduced.
For example, you can do a multi-stage build in three stages: install, build, and deploy. In this case, it is divided into an installation phase that downloads and installs dependencies, a build phase that builds using installed dependencies, and a distribution phase that copies and uses the final built result. As a result, the build is divided into three images, and the image in the final distribution stage uses only the result of the previous stage, so the size of the image can be reduced.
Multi-stage application case
The following is the Dockerfile configured using Multi-stage. The python:3.8-alpine image was used as the base image, and the build is divided into a builder that installs dependencies and a deployer that uses it.
FROM python:3.8-alpine AS builder

RUN apk update && apk add --no-cache make && apk add --no-cache libpq-dev g++

WORKDIR /app
COPY requirements* ./
RUN pip install --no-cache-dir -r requirements-prod.txt
COPY Makefile .
COPY src ./src


FROM python:3.8-alpine AS deployer
COPY --from=builder /usr/local/lib/python3.8/site-packages /usr/local/lib/python3.8/site-packages
COPY --from=builder /app /app
RUN apk update && apk add --no-cache make
WORKDIR /app

CMD ["make", "run-server"]
If you build using this, you will finally get a built image of 75.7MB.
REPOSITORY                                         TAG            IMAGE ID       CREATED              SIZE
backend-service-optimized                          latest         57aa097d0125   About a minute ago   75.7MB
Closing remarks
- We found that the size of an existing image can be reduced simply by selecting an appropriate base image, removing unnecessary packages, and multi-stage build.
- We were able to reduce the original 1.17GB image to 75.7MB.